Showing posts with label Breakfast. Show all posts

Cheese Omelette

Finally! Here's my 100th blog post since I started my blog in August last year :) This is a '2-in-1' post as I will be sharing a fairly simple cheese omelette recipe and a tutorial on making a creative ELMO sandwich. If you like creative sandwiches, you may like to view some of the sandwiches that I have done in the past here and here which are pretty similar to this ELMO sandwich using the same concept.

For the cheese omelette, here's the simple 3-ingredient recipe:
- 2 eggs
- a dollop of unsalted butter (abt 1 tsp)
- a handful of shredded cheddar cheese (abt 2 tbs)
- pinch of salt and pepper (to be added to the eggs. U can omit the salt coz I find it good without the salt too.)

1) Whisk the eggs and add the salt and pepper.
2) Heat up a non-stick pan and add the butter. Once butter melted completely, add the whisked eggs.
3) Sprinkle cheese across the middle of the omelette once the edges started to firm while the centre part is still raw.
4) Flip omelette with a spatula, giving it two folds before sliding the omelette off the pan onto the serving plate.
5) Garnish with fresh or dried herbs if desire.

As for the ELMO sandwich, below are the instructions that come with a step-by-step picture illustration.
1) Use a cup and place it in the middle of the sliced bread.
2) Press down to cut out a circle.
3) Cut the circle into half.
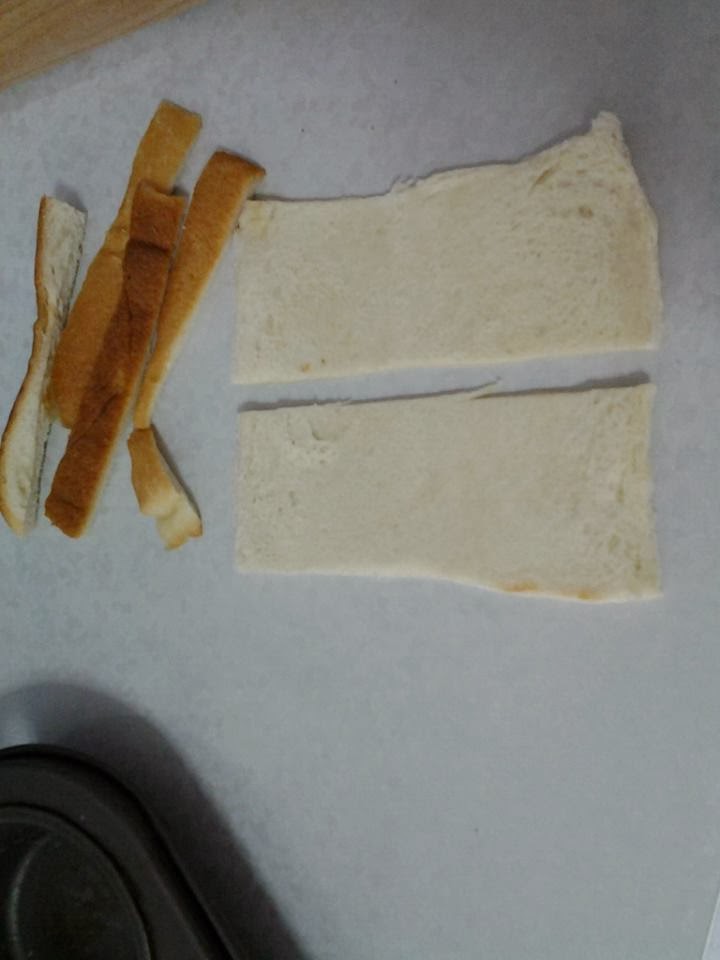
4) Trim the semi-circle as shown.
5) You get the mouth of Elmo.
6) Use the cap of a bottled mineral water/soy sauce to cut out two small circles.
7) There you go. You got the eyes and mouth.
8) Spread strawberry jam on a slice of bread.
9) Remaining small pieces of bread can be cut into smaller pieces and get tucked at the corner as shown.
10) Place the sliced bread from (1) over the sliced bread from (8).
11) Spread Nutella on the mouth and dot the eyes with Nutella too.
12) Assemble the pieces as shown and add a cherry tomato as nose.

Voila! Welcome to Elmo's world. Hope your little one will like it :)


Mixed Berries Refrigerator Oatmeal with Honey


Nutrients packed Mixed Berries Refrigerator Oatmeal with Honey! I made it without measuring tools but just a wooden tablespoon. I did it with reference to theyummylife.com

I placed it in the fridge at 10pm and ate it at 8am. The oats are soft yet come with a wee bit of crunch. Thumbs up! In one word, this 'cold porridge' is yummilicious!

This recipe serves one but you can x 2 for the ingredients so that your honey gets to enjoy it too. Erm...Honey as in your darling or dear whatever you address your partner. You will fully utilise the milk and yoghurt if you make 2 servings.

You will need:
- a jar ( I got the 0.5L Korken jar with lid at Ikea for $1.90)
- a chopboard and knife (to cut the strawberries into quarters)
- a wooden/plastic/ceramic tablespoon (Do not use metal spoon to scoop pure honey)

Ingredients:
- 9 tbs rolled oats (Do not use quick or instant oats)
- 1 small tub of low fat plain yoghurt (I got the Marigold which comes in a pack of 2 tubs)
- 1/2 small btl of milk abt 100ml (I got the Meiji 200ml skimmed milk)
- 1/2 tbs chia seeds (I added 1tbs but its still fine)
- 1 tbs of honey
- 1 handful of blueberries (when I said one handful, it literally means how much your hand can grab. The actual quantity does not matter)
- 1 handful of dried cranberries
- 4 strawberries (cut into quarters)

1) Add the oat.
2) Add milk.
3) Add yoghurt.
4) Add chia seeds.
5) Add honey.
6) Stir until well mixed.
7) Add the fruits.
8) Give it a few stir so that the fruits are well distributed in the mixture. Place in the fridge overnight before consumption.
9. Ready to consume straight from the jar.

It's well kept in the fridge for up to 2 days.

Enjoy!


原料:
- 9汤匙燕麦片(不要使用即时燕麦)
- 1个小桶的低脂纯酸奶
- 1/2小瓶牛奶约100毫升
- 1/2汤匙嘉种子(我加了1tbs)
- 1汤匙蜂蜜 
- 1把蓝莓
- 1小把红莓干
- 4粒草莓(切成四块)


1)放入燕麦
2)加入牛奶。
3)加入酸奶。
4)加入嘉种子。
5)加入蜂蜜。
6)搅拌至到混合。
7)加入水果。
8)再继续
搅拌至到混合。放入冰箱冷藏。
9。隔天打开罐子即能享用。 

Breakfast Cups

 
Breakfast Cups, nothing new but I tried using wanton skin instead, haha...bad idea. They got stuck in the muffin tin. I did oil it. Or was it because my muffin tin wasn't the non-stick type? Anyway, just stick to sliced bread okay :) and if you are gamed enough, you might want to use wanton skin too.

Ingredients
- 12 wanton skin or 6 sliced bread
- 6 bacons
- 6 eggs (55g)
- some oil or butter for greasing the muffin tin
- coarse black pepper and dried parsley

1) Grease muffin tin.

2) Trim away the crust of the bread (Optional - you may want to keep the crust) and roll it flat using a rolling pin. Cut bread into 2 and lay them on the muffin hole like a cross + and press down.
**Note: After I posted this, I was asked why the bread had to be flatten and also cut into 2. There are a few reasons.
a) Firstly, I was using stale bread which was already a bit dry. It was resistant to bending. It will tear even if you push it down the hole with just a little force. However, by flattening and cutting it into 2, the bread fits into the small muffin hole effortlessly.
b) Secondly, the muffin hole is kind of 'not big' so if the bread didn't get flattened, there will not be adequate space to fit the bacon and egg.
c) Thirdly, by layering the bread in a cross, the wall and base of the muffin hole gets protected so that this will reduce the tendency of the breakfast cup getting stuck when the egg solidifies. Hence easier removal from the muffin tin.

3) Pan fried bacons in frying pan until a little brown.

4) Line bacon within the bread and crack an egg in it.

5) Bake in pre-heated oven at 180c for 12 minutes.

6) Sprinkle with pepper and dried parsley.

Enjoy!

 
Grease muffin tin.
 
 
Pan fry bacons till a little brown.
 

Trim away crust and roll bread flat using a rolling pin.
 
 
Cut into 2.
 
 
Line bread onto hole like a cross + and press down.


I was using wanton skin and I lined 2 skin as shown.
 
 
Line bacon into muffin tin as shown.
 
 
Crack an egg into each muffin hole as shown and
bake in pre-heated oven at 180c for 12 minutes.

Yoghurt Mango Hotcakes

 
Hotcakes so good, you can even eat it on it's own.

Yield 5-7 pieces (depending on the size of the ladle you use)
Serve 2
In 15 minutes

Ingredients
- 1 cup self-raising flour
- 1 cup flavoured yoghurt drink of your choice (I used the Mango flavoured one here)
- 1 egg
- pinch of salt
- 2 1/2 - 3 tsp of sugar

1) Combine the flour, yoghurt drink, egg, sugar and salt in a bowl and whisk until well combined and smooth using a balloon whisk.

2) Pour a ladle of the batter into the non-stick pan. Batter will spread and set into a nice round shape naturally. *Tips: Fill the ladle full with every scoop so you will get hotcakes of even size.

3) When the batter started to bubble in the centre and the edges started to dry up, flip the hotcake and cook the other side till golden brown.

4) Serve on it's own or with whipped cream and fruits.

Enjoy!

Home-made Hotcakes

 
Preparing your hotcakes batter is just so cheap and easy!

Yield 5-7 pieces (depending on the size of the ladle you use)
Serve 2
In 15 minutes

Ingredients
- 1 cup self-raising flour
- 1 cup milk
- 1 egg
- pinch of salt
- sauce of your choice (maple syrup, chocolate sauce, butter and sugar or anything you can think of)
- coloring (optional)

1) Combine the flour, milk, egg and salt in a bowl and whisk until well combined and smooth using a balloon whisk.

2) Optional - Using a piping bag, pipe a heart shape (or any design) with the batter colored with food coloring onto a non-stick pan.

3) Pour a ladle of the batter into the non-stick pan. Batter will spread and set into a nice round shape naturally. *Tips: Fill the ladle full with every scoop so you will get hotcakes of even size.

3) When the batter started to bubble in the centre and the edges started to dry up, flip the hotcake and cook the other side till golden brown.

4) Serve with your favourite sauce.

Fun tips: Fill batter into a sauce bottle and you are ready to make hot cakes with irregular shapes and sizes simply by squeezing the bottle gently and 'drawing' onto the pan. Mickey, Hello Kitty, Minions...You name it, you draw it. Have fun! :)

Enjoy!

Click here for a step-by-step tutorial.